Customise Ads Manager columns
Are you new to Meta Advertising? After setting up attribution with FalconMetrics, it is important to have a good column-setup in Ads Manager so you can efficiently track key metrics and improve the campaign management and execute your ad strategy. This guide offers a step-by-step approach to customizing columns in Meta Ads Manager.
Configure the dashboard
- Navigate to: Meta Ads Manager
- Click on columns
- Click on customise columns
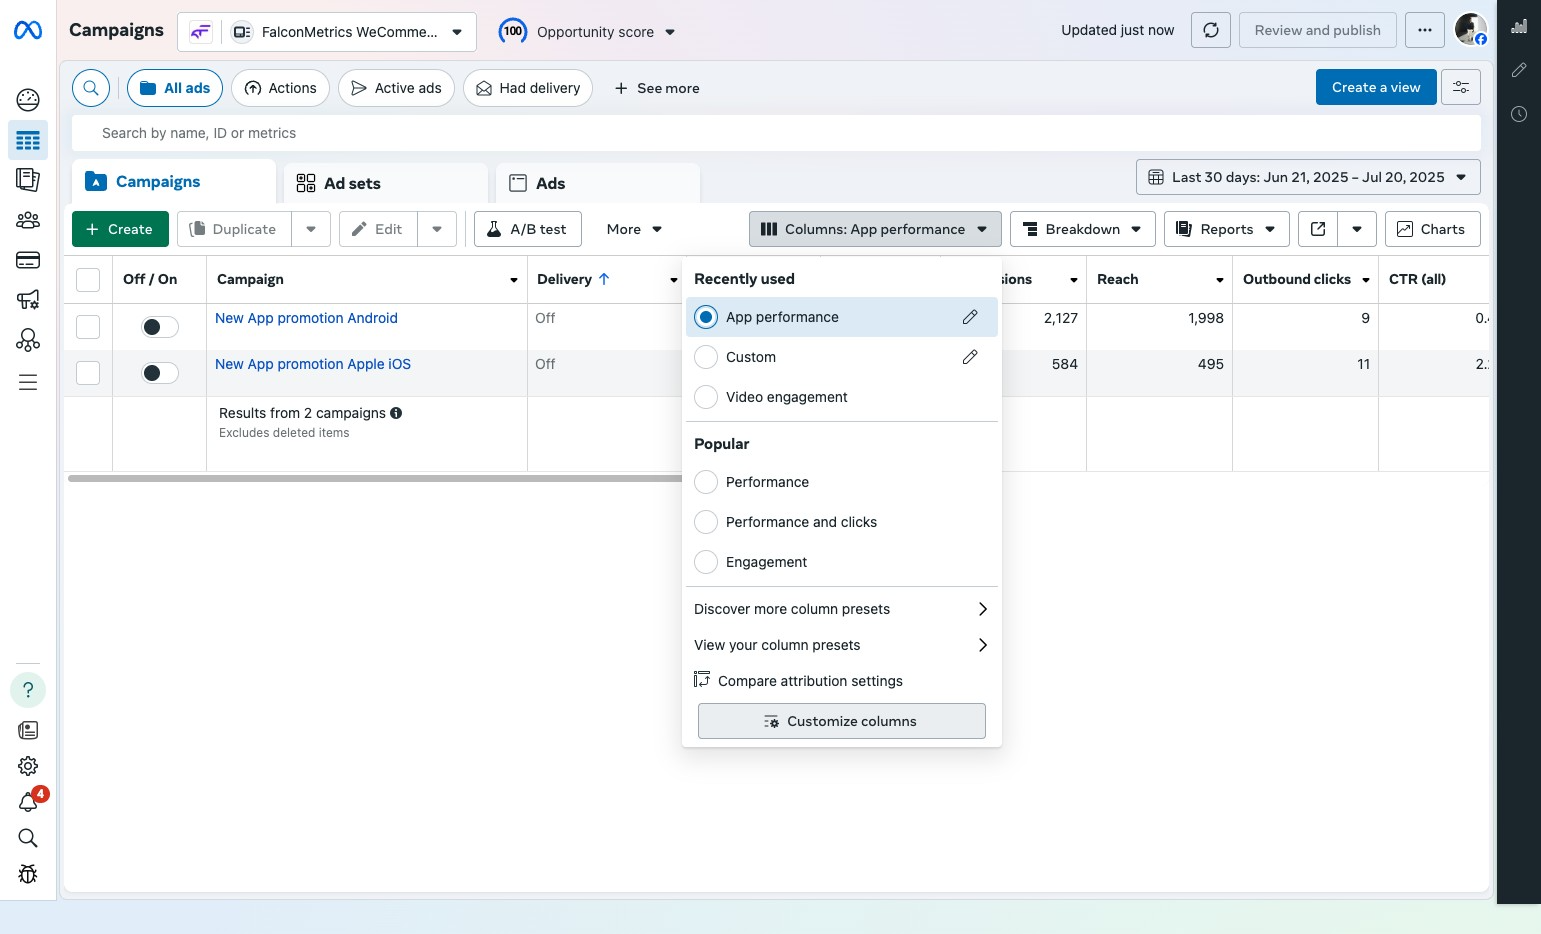
- Click the "search columns" field and search for columns that are missing in the standard column configuration. The columns that we recommend are:
- Delivery
- Bid strategy
- Budget
- Amount spent
- Impressions
- Reach
- Outbound clicks
- App installs
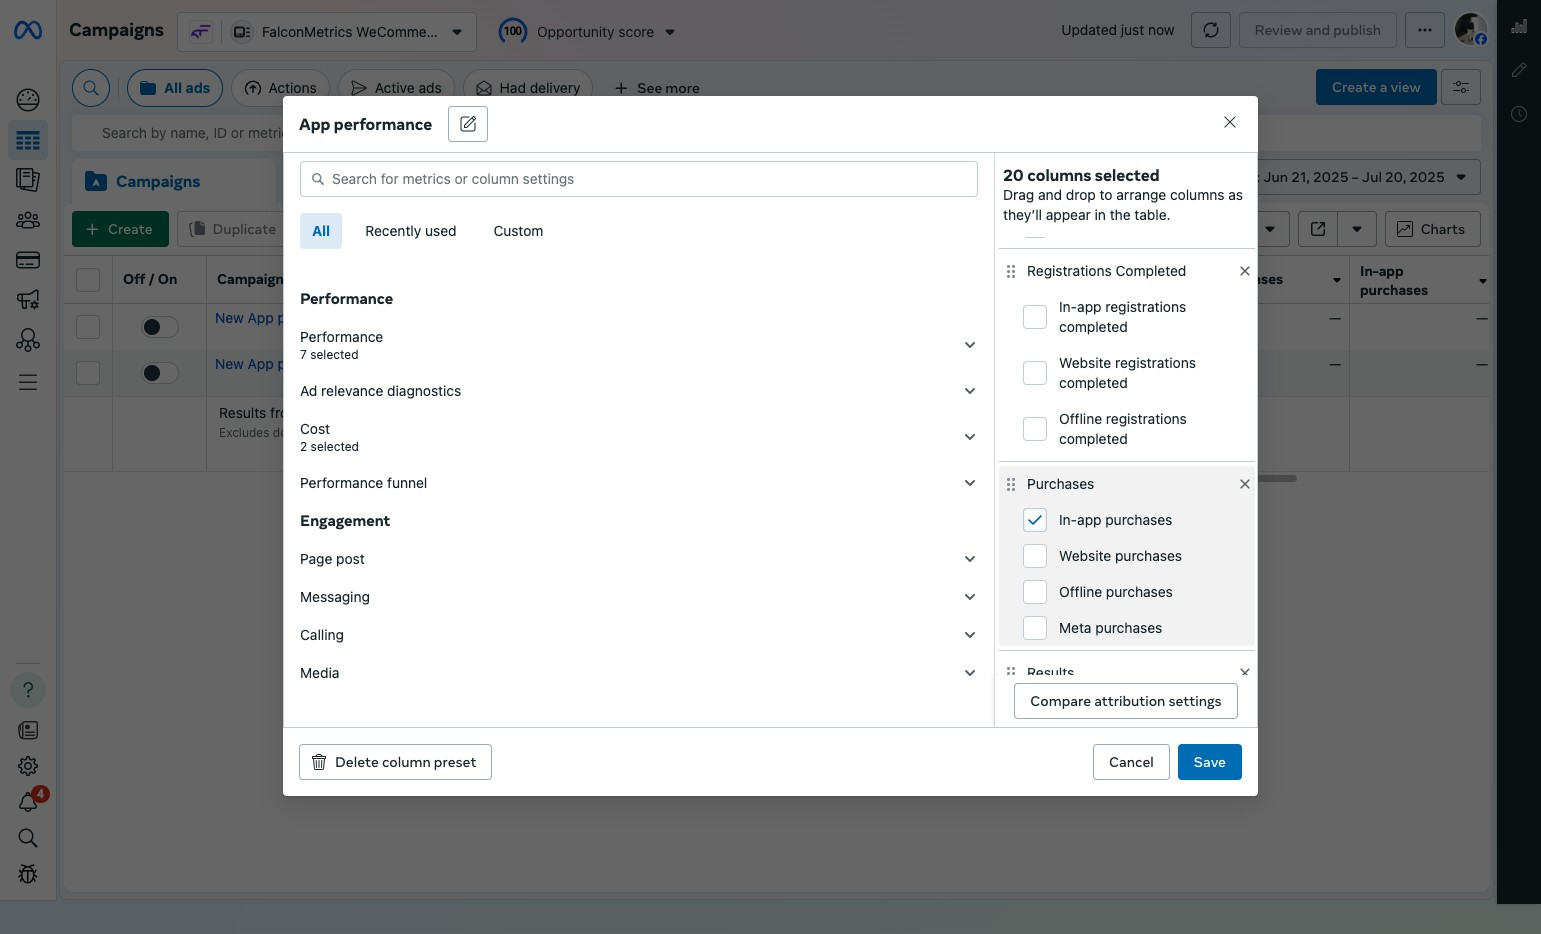
- Registrations completed
- Add to Cart (if relevant to your app)
- Checkouts Initiated (if relevant to your app)
- Purchases (if relevant to your app)
- Purchase ROAS Return On Ad Spent (if relevant to your app)
- Results (based on the goal of the campaign)
- CPM Cost per 1000 impressions
- CTR Click Through Rate
- Cost per outbound click
- Cost per result (based on what the goal of the campaign is)
- Cost per app install
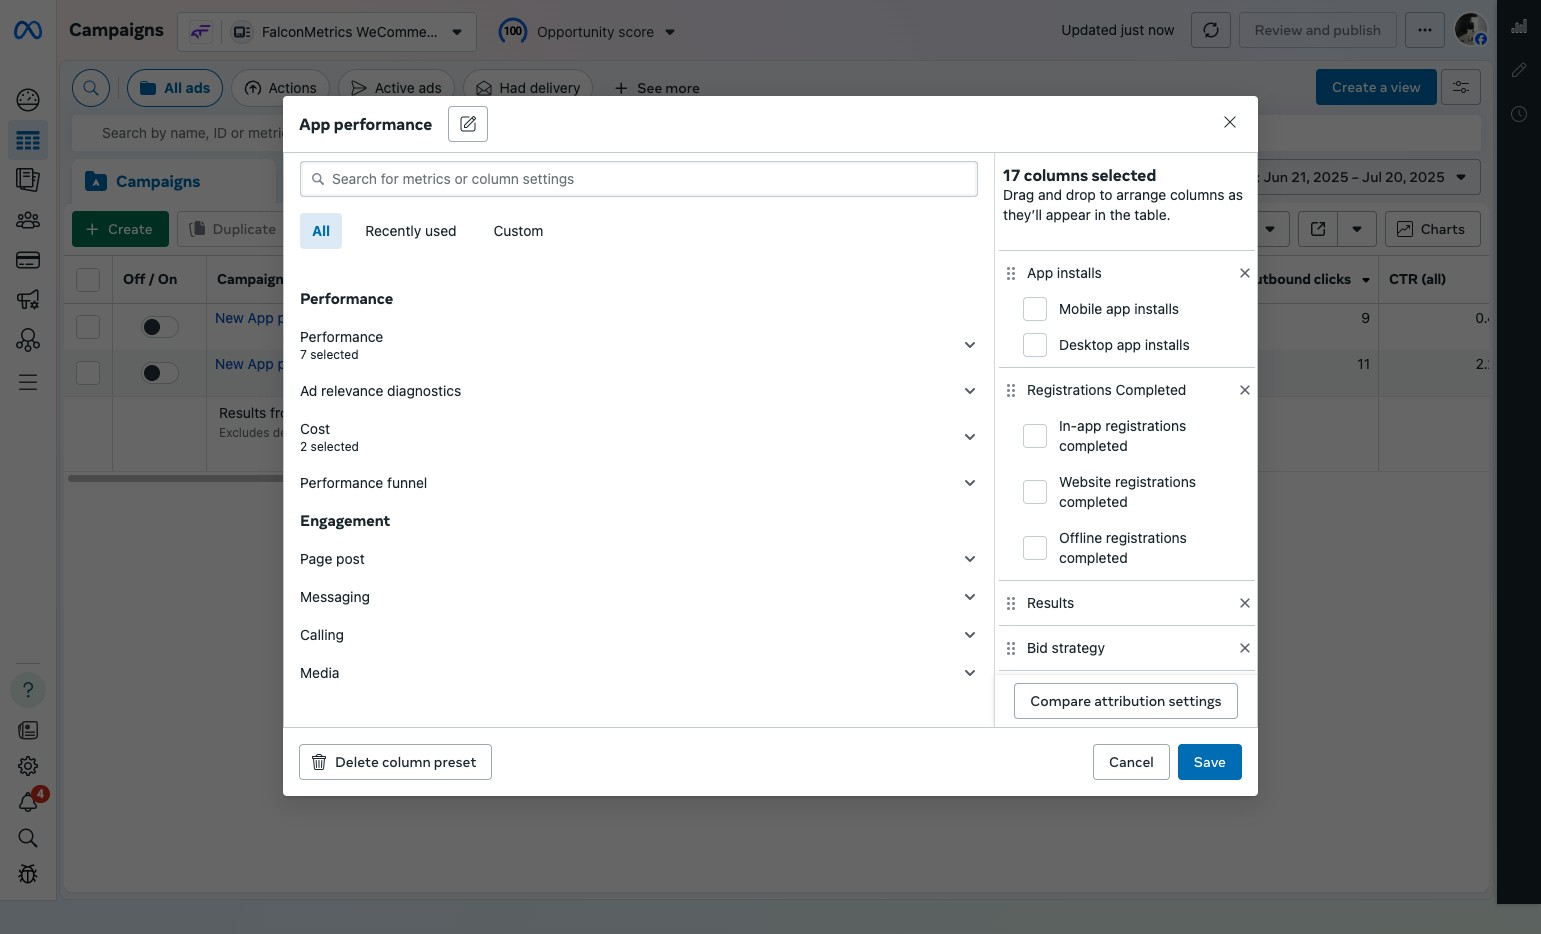
- In case of Purchase ROAS (Return on ad spend); select 'Total'
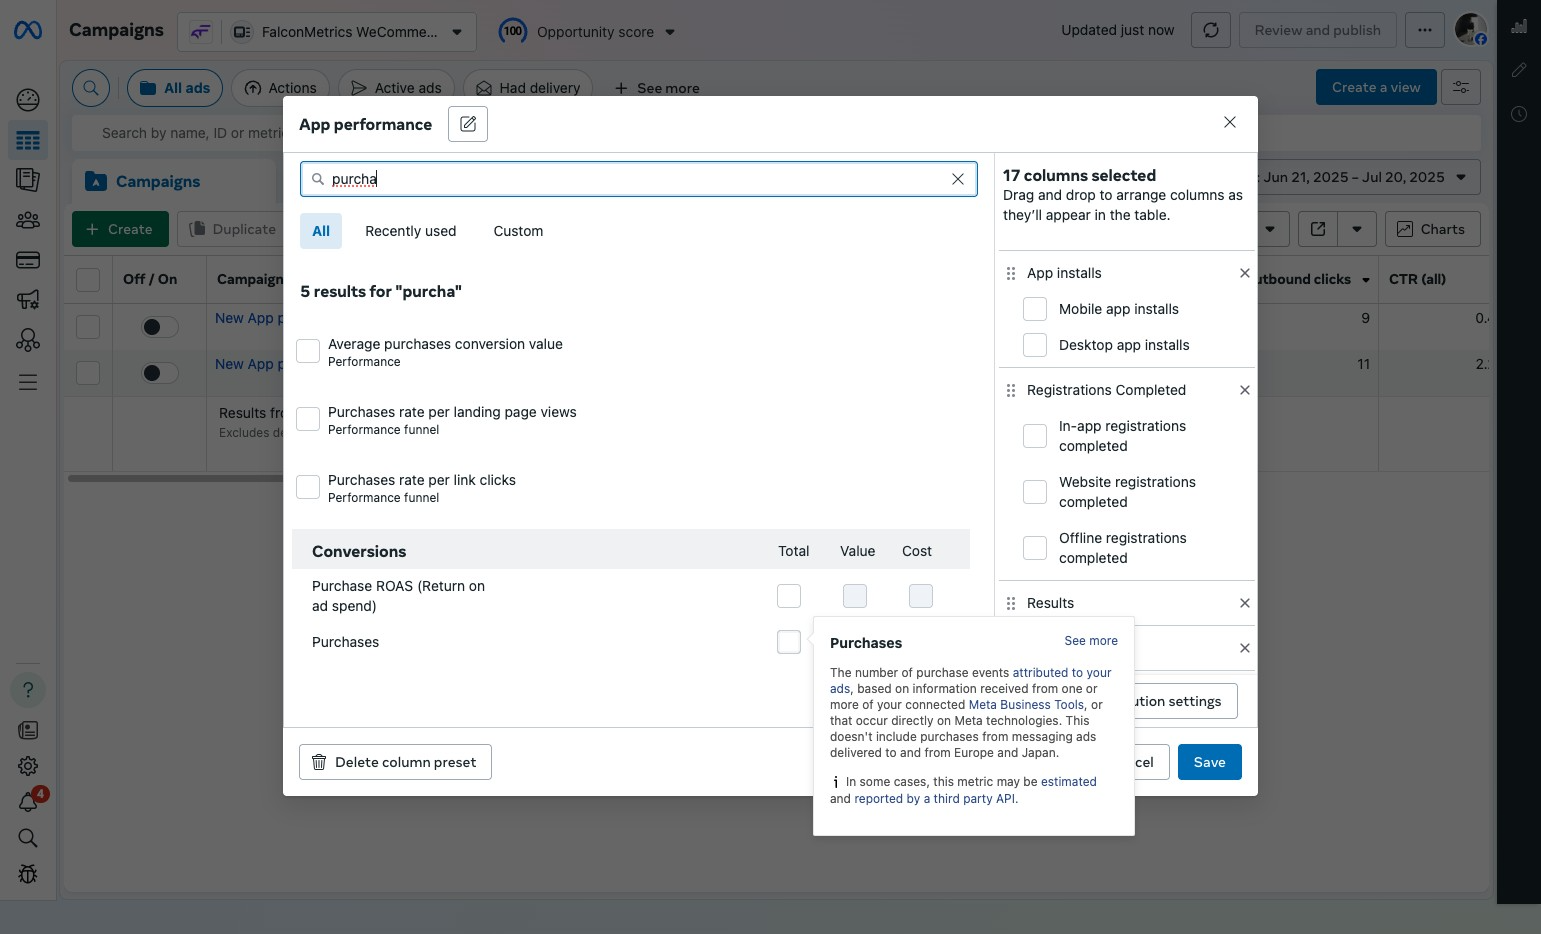
- In case of Purchases, select 'Total' and deselect on the right side the 4 options to keep the columns overview clean. This is also the case for:
- App installs
- Registrations Completed
- Adds to cart
- Checkouts Initiated
- Purchase ROAS
-
Click "Save"
-
After you're done selecting the columns, align them in the flow that makes the most sense for your app.
Questions?
Feel free to reach out to [email protected]